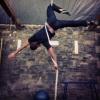
Michael Traynor Posted May 26, 2011 Share Posted May 26, 2011 I made a Pommel Mushroom:It took me 3 hours start to finish.It cost me nothing as I blagged materials and borrowed tools (my gym is attached to a friend's workshop). I was going to do a whole 'making of' video but I had no time, I am willing to make an in depth written guide to how I made it if people care enough so please reply to this thread if you want to know.Now to work on those circles! Link to comment Share on other sites More sharing options...
gymgreg Posted May 27, 2011 Share Posted May 27, 2011 Definitely interested in how you made the top part. Link to comment Share on other sites More sharing options...
Nic Scheelings Posted May 27, 2011 Share Posted May 27, 2011 I would also love to see the guide, could be a project for the future Link to comment Share on other sites More sharing options...
Razz Posted May 27, 2011 Share Posted May 27, 2011 That looks awesome Breaks! Link to comment Share on other sites More sharing options...
Cole Dano Posted May 27, 2011 Share Posted May 27, 2011 Nice work on the top. I'd enjoy an upholstery lesson as well. Link to comment Share on other sites More sharing options...
pogo69 Posted May 28, 2011 Share Posted May 28, 2011 Hah!! I've not long finished watching your inaugural mushroom training session... and while watching I was thinking "wish he'd made a vid of the mushroom construction process"!!Yes, very interested in the how to. Link to comment Share on other sites More sharing options...
Joshua Naterman Posted May 28, 2011 Share Posted May 28, 2011 Did you use lashing across the bottom to get tension and then staple? Or just staple, pull staple, and do that all the way around? Or maybe something different?Whatever you did, that looks great! I'd love to know what you decided to put on the top for padding! Link to comment Share on other sites More sharing options...
Michael Traynor Posted May 28, 2011 Author Share Posted May 28, 2011 HOW I MADE THE MUSHROOM:(I apologise for lack of pictures and videos, If i make another, which I may well do, I will make a video).Materials:Base:1 Large Wooden Cable Reel (Can be blagged from many different companies, these are 2 circles of chipboard with a central plyboard cylinder wrapped and stabled around 8 alluminium uprights). - 18" in height (or thereabouts) top to be 22" or less in Diameter, or you can saw bits off like I did.Top:1. Chipboard/MDF/Wood sheet that is at least 23" square.2. Foam Carpet Underlay (surprisingly large offcuts can be obtained by speaking nicely to a carpet fitter - which is what I did).3. Spray Adhesive4. Thin Vinyl.5. Polyurathane Cushioning Foam.Tools and Hardware:Cordless Drill with a decent torque setting and drill setting.Carpentry Drill PieceScrewdriver Drill PieceCountersink Drill PieceSander (I used and angle grinder with a flap sander disc - you can use nothing or sand paper).Band saw/Jigsaw/Coping Saw/Hand Saw (something you can cut a circle of wood with).Long Screws (I used 8" as the top of the Cable Reel was very thick).Staple Gun and staples.Sharp ScissorsString, Pen, Ruler or a more elegant way to draw circles with specific diameters.Construction of the Top:1. Take the sheet of Chipboard or chosen wood and cut a circle from it with a 22" Diameter. I used a Band Saw.2. Using a Piece of string tied to a pen draw a circle of 22" Diameter onto your Foam carpet underlay. You will need circles of Carpet underlay with the following Diameters: 2 x 22", 1 x 20", 1x18", 1x16", 1x14" and 1x12". Cut these out with sharp Scissors.3. Spray the wood base and the first 22" Foam circle with adhesive, allow to go tacky for 1-2 mins and carefully attach. Repeat this process being careful to spray both sides, and allow the adhesive to go off slightly before constructing the foam circles like a pyramid. Using adhesive also attach a long strip of foam to the edge of the wooden base for extra safety.4. Then take a thin circle of foam stuffing about 30" in diameter and stretch it accross the whole top stapling it securely underneath the wooden base at regular intervals (This is the type of foam that they stuff teddy bears with it is very light and and doesn't add a lot of bulk but helps disquise the 'stepping' nature of your foam underlay - In use you cannot tell that the muschroom top 'steps' down like this).5. Take a 32" circle of Vinyl (or larger depending on the thinknes of your carpet underlay). Place the now dry mushroom top upside down on the vinyl and begin to upholser the mushroom top. Pull one section of the Vinyl tight and staple in place, now work your way around the circle, pulling taught the vinyl and stapling every 2 or 3 inches, staple close to the edge of the mushroom and make sure that you get no folds. This is surprisingly easy, and any mistakes can be easily rectified by removing the staples carefully.Attaching your top to the already made base:All that remains is to attach the 2 which is very easy. Countersink 8 holes at regular intervals going up through one side of the base nominated as the top. Then using a suitable sized drill bit (for the diameter of your screws) drill through the holes all the way in the base (this will help the screws to get extra bite on the top, keeping the Mushroom secure). Now line up the top and base screwing in the screws on a fairly high torque setting through the base and up into the top of the mushroom.If like mine your base is a little crappy andlikely to give people splinters, sand off the endges before attaching the top.FINAL STEP:Get on the mushroom, video yourself being a clumsy oaf and post it my thread in 'digital coaching'Photos for clarity:Cable Reel/Spool/Drum (like this):Carpet Underlay like this: Link to comment Share on other sites More sharing options...
Michael Traynor Posted May 28, 2011 Author Share Posted May 28, 2011 I will have inevitably missed things out so please do ask any questions But the whole process was pretty straight forward the main issue is just being bothered to find/blag the materials and make the thing, I made the top 2 weeks before I found a base. But as I said it was all free and didn't take long to put together. Incidentally all the floor mats in my videos were made by Joining 3 layers of foam carpet underlay together with spray adhesive and covering with plastic vinyl (also sprayed into place - but if they were going to be moved a lot then sewing would be better), I made 28' by 5' of mats in an afternoon for £80 of materials. 1 Link to comment Share on other sites More sharing options...
kcjb Posted May 29, 2011 Share Posted May 29, 2011 Incidentally all the floor mats in my videos were made by Joining 3 layers of foam carpet underlay together with spray adhesive and covering with plastic vinyl (also sprayed into place - but if they were going to be moved a lot then sewing would be better), I made 28' by 5' of mats in an afternoon for £80 of materials.Awesome stuff Breaks. Did you buy the plastic vinyl at a fabric store? Link to comment Share on other sites More sharing options...
Michael Traynor Posted May 29, 2011 Author Share Posted May 29, 2011 There is a charity next door to the building I train in called "the scrap store", they sell all kinds of offcuts of fabric as well as various other bits of unused industrial stuff and they had the vinyl rolls there, mine has a leather effect finish, but yeah any fabric store should also sell it. Link to comment Share on other sites More sharing options...


Recommended Posts
Please sign in to comment
You will be able to leave a comment after signing in
Sign In Now